Slow Braised Beef Cheeks

One of the absolute joys of recent years is discovering the wonder of slow cooked beef and pork cheeks!

Everyone has their own way of making a spaghetti bolognese don't they? Whether it's the Italian traditional method of making a slow cooked ragu from bones and marrow, a recipe passed down through the generations or out of a ready mix jar we all have our ways of making what has become almost a staple on the weekly menu's in many Irish and UK households.

I spent most of my childhood arguing with people that macaroni cheese wasn't in fact just macaroni pasta and cheese sauce. Vehemently did I protest that there was meat in it and something calle "rattatoo-ee", whatever the hell that was. It wasn't until I was well into my 20's that I had my first taste of what the rest of the world understands to be "Macaroni Cheese" and to be honest I didn't rate it much at all against my mum's version!

Slow Braised Beef Cheeks

One of the absolute joys of recent years is discovering the wonder of slow cooked beef and pork cheeks!

Probably even five years ago, it might not be something we would choose to eat, but with the growing popularity in nose to tail eating and cooking, offal and many rediscovering how lovely slow cooking is (largely due to the rise in popularity of slow cookers again), they have started to crop up on restaurant menus and, if you are lucky enough to have access to a traditional butcher that still sells the less expensive cuts, in home kitchens too!

Beef Cheeks are a gift: the pack a punch flavour wise, give incredible yield of meat, are much more cost effective than a steak and also help in doing our bit to reduce waste when it comes to using all of the animal.

They are also a hard working muscle on the animal and so need long and slow cooking to break them down so we can access their incredible flavour and texture. Slow cooked, or braised, correctly, and the meat will do that thing where it just melts at a touch of a fork and feathers away.

Glorious Beef Cheeks!

I love cooking beef cheeks. I don’t own a slow cooker myself, so for me it is all about the slow braise with plenty of vegetables, herbs and red wine. The absolute best way to eat them is with a creamy, rooty mash of some kind: potato, celeriac or swede work particularly well. Alternatively, whip up a batch of creamed polenta and serve with a melange of wild mushrooms and wild kale. I always save the cooking liquor from the braise, sieve it and then reduce it and thicken it with a little roux for a sauce that perfectly reflects the cooking of the beef cheek. You can of course also use a slow cooker for this recipe if you have one, it will reward you with the most comforting of home cooked dishes for a cold winters’ night!

Ingredients:

  • 2 tsp of olive oil
  • 2 celery sticks, washed, trimmed, finely sliced
  • 2 carrots, washed, peeled and finely diced
  • 2 cloves of garlic, peeled and smashed
  • 1 medium onion (red or white), peeled and finely sliced
  • Handful of cherry tomatoes, halved
  • 2 bay leaves
  • Small handful of mixed woody herbs: thyme and rosemary etc
  • 500ml of good quality chicken stock (preferably homemade)
  • 300ml of a robust, full bodied red wine
  • 2-4 beef cheeks (add more wine if cooking more than two cheeks)
  • Knob of butter.

Method:

  • About an hour before cooking, lightly salt the beef cheeks with a good quality sea salt. Set aside.
  • Bring the oven to 150 degrees Celsius, no fan.
  • Into a deep cook pot with a lid, add the oil oil and two thirds of the celery, carrot, onion, garlic and tomato mix, and half the amount of herbs. Mix together.
  • On top of the vegetables, add your beef cheeks.
  • On top of the beef cheeks, add the remaining vegetable and herb mix.
  • Pour in the chicken stock and red wine. Add a generous knob of butter on top.
  • No need to season at this stage, you can do this when you are preparing the sauce later.
  • Place into the oven and cook for 3.5 to 4 hours, turning the cheeks once or twice. Cook until the meat has cooked through to tender – if you were to press it with a fork it should be soft and yielding.
  • When cooked, remove the cheeks from the braising liquid and set them aside to rest.
  • Sieve out the vegetables from the braising liquid, keep the liquid!
  • Place the liquid in a saucepan and cook until reduced by half. Add in a little cornflower mixed with warm water, add to the sauce and whisk out any lumps that might form.
  • Bring the sauce up to a simmer, and return the cheeks to it to warm through gently. Season with sea salt and freshly ground black pepper.
  • Serve up with a creamy rooty mash, some kale and a generous drizzle of the sauce.

Enjoy…!

One Hour Spaghetti Bolognese with Courgette, Lemon and Chilli Salad

Everyone has their own way of making a spaghetti bolognese don’t they? Whether it’s the Italian traditional method of making a slow cooked ragu from bones and marrow, a recipe passed down through the generations or out of a ready mix jar we all have our ways of making what has become almost a staple on the weekly menu’s in many Irish and UK households.


On a weekday evening, I dedicate up to an hour cooking the dinner. I figure that for most dishes, even for ones that are a traditional slow cook like a spaghetti bolognese, an hour gives you enough time to develop a decent bit of flavour without being a slave to the stove when there are so many other things on an evening to attend to besides dinner. Here below is my take. I am not afraid to make use of some shortcuts, but where it matters the bulk of the meal is always made from scratch; fresh and full of flavour!

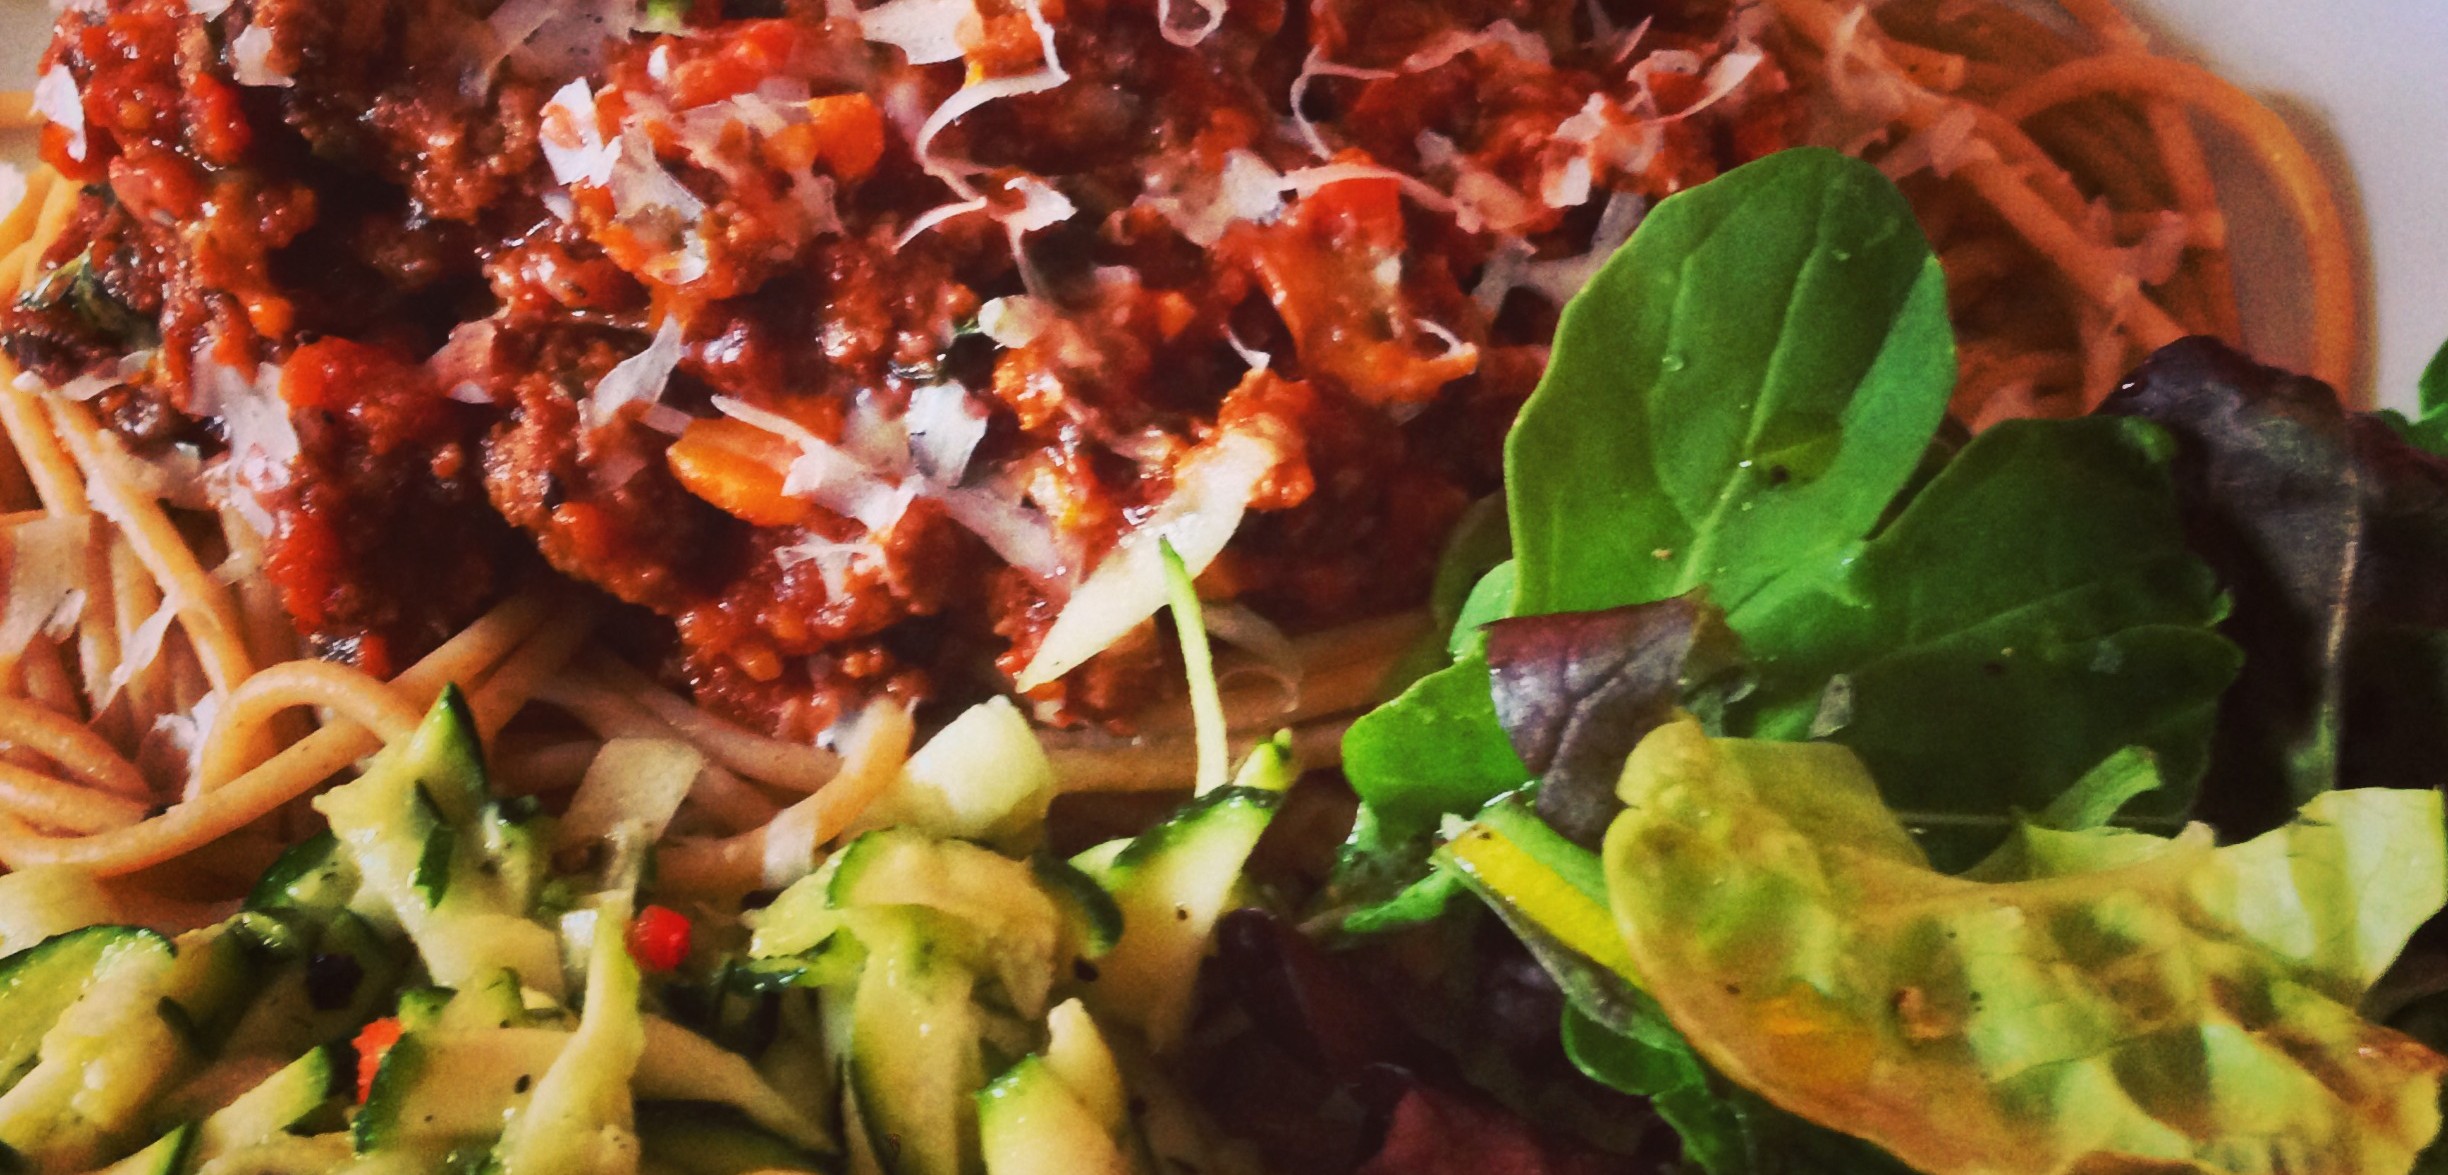
The below recipe would feed two generously or four moderately when accompanied with the Courgette Salad and sides. Enjoy!

Before we start, a quick note on tomato sauces: Every tomato sauce needs a good base. I find that a really good base can be wizzed up in a couple of minutes using either sun-blushed or sun-dried tomatos. Sun-dried tomatoes will give a very deep, smoky, slightly tannic flavour whereas using sun-blushed provides a lighter and sweeter flavour which allows the other herby notes to carry through much more. Try to use deli-fresh product rather than jarred, but if that’s all that’s available then trust me, it’s still miles better than the jarred bolognese mixes. The longer you cook the ragu (bolognese) the more flavour you will get – just mind it from time to time, ensuring it doesn’t stick to the pan.

For the Sauce:
Put all of the following ingredients into a mini blender (or a pestle and morter if you don’t have a mini-blender – quantity is not enough to use a blender or a large processor for this) and wizz up for a few seconds until blended together.

About 50g of either sun-blushed or sun-dried tomatoes (you can add more for a stronger taste of course, just be careful on getting the balance right especially with the sun dried toms)
2 cloves of garlic
A small handful each of basil and oregano
A drizzle of extra virgin olive oil
A good pinch of Maldon sea salt flakes and freshly ground black pepper
A pinch of sugar ONLY if using sun-dried tomato’s to get a sweeter balance going on.
Next, heat a teaspoon of olive oil in a non-stick pan (preferably one you can cover with a lid later) and add in 250g of best quallity lean beef steak mince. I suggest making friends with your local butcher rather than using the watery pre-packed stuff from the supermarket. Brown off the meat for a few minutes. Place a couple of sheets of kitchen toweling on a plate and spoon out the browned mince onto it, leaving in the pan as many of the meat juices as possible – don’t throw this away!

Next, lower the heat on the hob, add in your wizzed up tomato paste to the pan with the meat juices and cook for a couple of minutes, adding a little water (rather than more oil) to the pan if it sticks. Add in one tin of plain chopped tomatos (400g), a handful of mixed chopped basil and oregano, a teaspoon of good quality balsamic vinegar and 1 jellied beef stock cube (nice cheat!). Let that all mix in together until the stock has melted in. Add in the beef and three finely chopped mushrooms. The mushrooms help to add non-meaty but yet meaty bulk to the dish which is healthier than just adding more meat! Give everything a good stir, turn the heat right down to a bare simmer, cover and leave to cook through and for the flavours to develop. Move on to preparing your sides.

Courgette, Chilli and Lemon Salad:
Set up your food processor with the grater blade. If you don’t have this, you can use a normal grater, just takes a little longer.

Clean 2 courgettes, top and tail them and then cut them lengthways so you have 4 halves.
Put the courgettes through the grater, transfer into a bowl for dressing and presentation.
Add the zest and juice of 1 lemon.
Slice 1 red chilli diagonally (the heat will depend on the chilli you use – I have used a jalapeno type chilli for this dish so that there is background heat but it doesn’t overpower). Saving a few slices for garnish, take the rest and chop finely. Add to the courgette and lemon mix.
Season with Maldon sea salt and plenty of freshly ground black pepper.
Add in 1/2 tablespoon of extra virgin olive oil.
Toss the salad. Garnish with the remaining chilli slices.
Green Salad:
In a bowl add in a very small dash of extra virgin olive oil, lemon juice, sea salt and pepper.
Add a couple of good handfuls of organic peppery leaves (giving a different texture and flavour).
Set aside and when everything else is ready, toss the leaves in the dressing sitting underneath. Doing it this way means that the leaves will not wilt under the acid of the lemon.
Return to your bolognese give it a stir, replace the lid and further reduce the heat if necessary. It shouldn’t be drying out as yet so will still look a little wet – this is fine. If it is drying out you have cooked it on too high a heat too fast! Take it back!
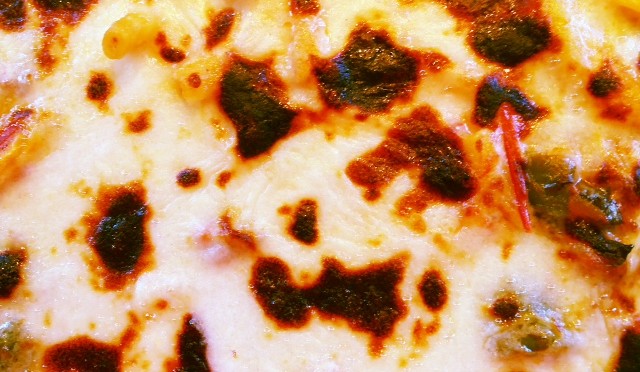
Garlic Bread:
Making your own garlic bread is so easy and by substituting olive oil instead of butter really cuts down the calories:

In a pestle and morter, add 2 cloves of garlic, a pinch of sea salt flakes, freshly ground black pepper, and a small handful each of basil and flat leaf parsley.
Bash together in the pestle and morter and when it has been broken down sufficiently (should take but a few seconds), add in a small glug of extra virgin olive oil and mix well together.
Take a part baked ciabatta – either 1 small one per person or one large one. Make diagonal slices across the bread, but only half way through it.
Using either your fingers or for those adverse to this kind of texture, use a basting brush to put as much of the garlic and herb mixture in between the slices and all over the top of the bread.
Take a piece of parchment paper and rinse it under a tap and then squeeze it out completely. Lay it on a baking tray, wrap the ciabattas within and place in the oven at 200 deg C for the length of time advised on the pack.
Half way through cooking, open up the parchment paper, this will ensure the bread crisps up on top.
Slice the bread all the way through and present on a nice plate / board etc.
Back to the bolognese, uncover stir and add in 1/2 tablespoon of fresh chopped basil. Keep the cover off at this point to help reduce the sauce, but keep an eye on it so it doesn’t stick.

In a pan of boiling water, place enough spaghetti for the number of people dining, but remember there are plenty of sides so you can reduce the amount of carbs making it a little less calorific for you. The type of spaghetti you use is a matter of personal choice: fresh or dry, white, brown, gluten free etc you can tailor it to your preference. I personally only use organic wholewheat spaghetti – I like the nutty taste, the slightly rougher texture and the fact that it has a lower GI index than white pasta. Cook according to packet instructions. When ready, drain fully, return to the empty pan and add a small amount of extra virgin olive oil to keep it nice and lubricated. Add in the bolognese sauce and mix through, decant onto a nice warm serving platter and take to the table.

Dress the green salad and take to the table along with the courgette salad and the garlic bread.

Serve with a nice bottle of Valpolicella and enjoy!

My Mum’s “Not Very Macaroni Cheese” Macaroni Cheese

I spent most of my childhood arguing with people that macaroni cheese wasn’t in fact just macaroni pasta and cheese sauce. Vehemently did I protest that there was meat in it and something calle “rattatoo-ee”, whatever the hell that was. It wasn’t until I was well into my 20’s that I had my first taste of what the rest of the world understands to be “Macaroni Cheese” and to be honest I didn’t rate it much at all against my mum’s version!


So over all these years I have stuck pretty darn close to my mum’s traditional recipe – wherever she got it from. The only change I have made is that I make my own cheese sauce to go on top rather than the packet Schwarz mix mum used, but to be honest for this particular dish, I would quite happilly use a three-cheese packet mix – just for the pure nostlagia of the dish.

Ingredients (serves 4 – 6 depending on appetite):
350g of organic lean minced beef
1tsp of olive oil
Half a red onion, diced
1 clove of garlic, diced
400g tin of chopped tomatoes
400g tin of ratatouile (I like the Epicure brand, or of course you could make your own if you have the time)
1 green pepper, 1cm diced pieces
10 cherry tomatoes, halved
1 bay leaf
Small bunch of fresh thyme
Freshly ground black pepper and a pinch of salt
Apx 200g of any kind of pasta – doesn’t have to be macaroni: Conchiglie or Fusilli work well as well.
For the cheese sauce make a basic roux and add plenty of strong cheese.
Method:
In a frying pan, brown off the beef without adding any extra oil. When browned, turn out onto some kitchen paper.
Put the pan back on the heat and add the olive oil, onion and garlic and fry until onion is soft.
Add into the pan the peppers and cherry tomatoes, bay leaf and thyme, cook for a minute or so.
Add the tin of ratatouille and the chopped tomatoes, stir and then add the beef back into the pan.
Season well with plenty of black pepper.
Bring to a boil and then turn the heat down to low and cook through, stirring occassionally for about 15 minutes.
Season with a small pinch of salt at the end. You don’t need much if you are using the tinned ratatoille as there will be plenty of salt in that.
Meanwhile, put the pasta on to cook remembering to season the boiling water well. Drain when the pasta is just a little over al dente.
Make the roux, add milk and cheese and stir until combined and thickly coats the back of the spoon.
Put the grill on to high.
Pour the pasta and the meat mix into a lasagne / casserole dish and mix through.
Pour the cheese sauce on top and grate a little more cheese over the top.
Place under the grill and cook until the cheese starts to brown – personally the more “burny bits” the better! Should take about 5-8 mins.
Dish out a portion on each plate and serve with a fresh salad of salad leaves with cracked black pepper and a spritz of lemon juice.
Delve in hungrilly and Enjoy!

web design and development by the designer of things